
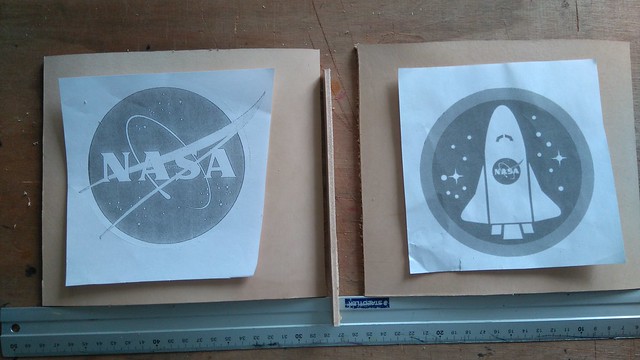
I am always looking for images that I think would work well as carvings a friend on Instagram works for NASA and their logos really appeal to me.
Here are the original images I have placed them on some blank boxes to see what they would look like.
![DSC_0041[1]](https://farm8.staticflickr.com/7677/27026871005_0107cf4827_z.jpg)
The next step is to cut some pieces of leather and prepare it for carving
The same pictures but this time on the leather ready for carving
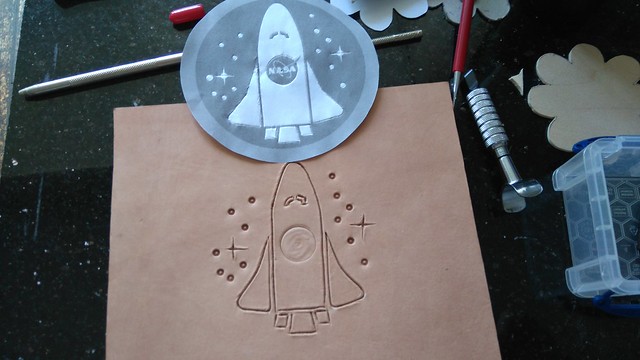

The images were transferred to the wet leather by using a pointed modelling tool to trace through the paper. After tracing I used a special tool called a swivel knife to cut along these lines.
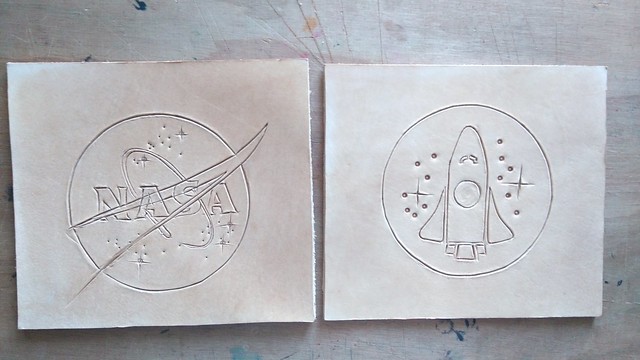
I have to be honest I am not really impressed with the results the box blanks are not a matching pair and the carvings are not as good as I would like either.
To correct this I am planning on making a matched pair of boxes. As for the carvings I am considering veneer as an alternative they look a little simple to me.
Did I really say veneer it is not as easy as I remember it.
To start the process I printed off 6 copies of the image sharpened my knife and started cutting. I cut out the stripe first and stuck the paper template onto some red veneer and then cut around the template. Finally sticking the veneer to another copy of the image like this.
![DSC_0079[1]](https://farm8.staticflickr.com/7432/26752789303_46dbdb4cc1_z.jpg)
Because I used the same image to cut the red veneer I matched all of the lines up on both pieces. I have left the paper on to assist in cutting out the pieces to allow the white letters to fit into the red stripe.
![DSC_0082[1]](https://farm8.staticflickr.com/7568/26752790483_ea7c96d765_z.jpg)
I have started to remove the paper from the top of the white and red veneer not sure how well the veneer shows in the pictures.
![DSC_0089[1]](https://farm8.staticflickr.com/7345/27350747782_6f0d436a90_z.jpg)
The paper now has the different coloured veneer stuck to it now it is time to fill in the gaps between the letters. Each small piece is cut out individually be hand. The loop around the word NASA is made from boxwood which has been soaked in water and bent to form the shape it took hours just to do this one piece.
![DSC_0092[1]](https://farm8.staticflickr.com/7225/27350748122_0b0a296620_z.jpg)
Things might get a little confusing here I have scratched my head a few times.
This is the front the background is black the masking tape will hold everything together while I cut around the outline. once the cutting is finished I will turn over and pick away the pieces that are not wanted.
![DSC_0093[1]](https://farm8.staticflickr.com/7429/27350748462_db070d9fe1_z.jpg)
The next stage will be to make the boxes I need to avoid cutting at the moment so there will be a delay.
Once the veneer was finished I glued it to the top of the box after veneering the sides.
![DSC_0153[1]](https://farm8.staticflickr.com/7091/27481713946_314510b6ae_z.jpg)
I added a little extra detail around the edge of the box
![DSC_0162[1]](https://farm8.staticflickr.com/7049/27481718666_0428bd4356_z.jpg)
Here is the box ready for cutting the handsaw is a Japanese handsaw which cuts on the pull stroke rather than the push stroke of a European saw. this is far easier for me to use.
![DSC_0980[1]](https://farm9.staticflickr.com/8021/29820499505_692a11483c_z.jpg)
After cutting the box into the two pieces I needed to veneer the bare edges. I use a standard domestic iron and PVA glue to fix the veneer in place.
![DSC_0983[1]](https://farm9.staticflickr.com/8089/29192766384_61f7daccf4_z.jpg)
![DSC_0985[1]](https://farm9.staticflickr.com/8073/29192766674_a903069c84_z.jpg)
Veneer trimmed and sanded.
![DSC_0987[1]](https://farm9.staticflickr.com/8422/29192767034_edb294212e_c.jpg)
Whilst I was waiting for the glue to fully harden I turned my attention the inside. As I knew where this box is going I had a set of initials to emboss inside of the lid. My method is to print the initials in the required font twice.
![DSC_0966[1]](https://farm9.staticflickr.com/8140/29820498595_93757757cf_c.jpg)
The first set are rough cut and glued to some suede.
![DSC_0968[1]](https://farm9.staticflickr.com/8144/29707432832_33237578f6_z.jpg)
![DSC_0970[1]](https://farm8.staticflickr.com/7749/29192765394_0a090c3fab_z.jpg)
I made lots of templates some good some not so good 🙂
![DSC_0990[1]](https://farm8.staticflickr.com/7575/29737591671_fbb0aa39bf_z.jpg)
I marked out centre lines on the backing board and the paper with the initials to aid lining them up , Then I trimmed the paper to allow me to mark out the position of the letters.
![DSC_0993[1]](https://farm9.staticflickr.com/8392/29192768234_410103ec00_z.jpg)
After gluing the letters in place it was simply a case of gluing the suede over the top. Did I really say simply 🙂 🙂 ha ha…
![DSC_1000[1]](https://farm9.staticflickr.com/8778/29727505932_70de15380b_z.jpg)
I normally use dowels to create the dividers for the pens however I decided to try something different this time. I marked out a piece of card which I folded to create dividers.
![DSC_1005[1]](https://farm9.staticflickr.com/8170/29214435793_b8d12f6008_z.jpg)
![DSC_1008[1]](https://farm9.staticflickr.com/8507/29805134476_ef2530de46_z.jpg)
I have to be honest I am not sure if I like the finished result I definitely do not like the red dots I will change them to black.
![DSC_1014[1]](https://farm9.staticflickr.com/8426/29727508482_d63c8b230b_z.jpg)
Thanks for looking
Michael

That looks if you didn’t use a beveler at all. Am I right?
If so, try it. Really, get just one size, a hammer, and try it out on that design. I bet with you that’ll get you the result you’re looking for. It’ll make all the difference to that design, I promise.
As a first intro into that, try Jim Linnell’s stream over at the Tandy Leather videos. They do great instructionals.
LikeLiked by 1 person
Hi Nadine Yes you are exactly right I have not bevelled the design. I bought a book by Al Stolman. I have started watching the videos more practice needed I think
LikeLiked by 1 person
Just try a few 🙂 It’s easier than it looks, and the results are amazing. I’m looking forward to seeing your first works.
A little tip from my trainer: let the hammer do the pushing of the beveler. Just a tiny dip to the side, and it’s nearly effortless.
Have fun!
LikeLike